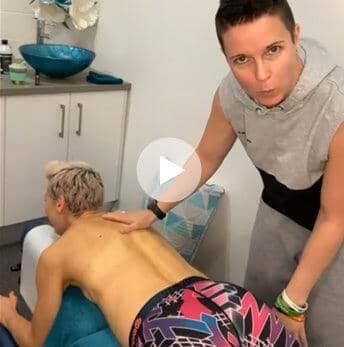
See What Treatment Tuesday is Like Here - Sore back! It could be a Rib out.
Ribs are most likely to cause pain in between the thoracic spine and the shoulder blades. When they subluxate they cause swelling which is exacerbated by movement and deep breathing.
Using the Dr Kez ChiroLab Therapeutic Ultrasound may assist in reducing inflammation and encourage faster soft tissue healing, helping you to remain physically active, all in the comfort of your own home! This is the very same ultrasound that Dr Kez uses on her patients in clinical practice.
Another great way to alleviate the tension and tightness in this thoracic spine / rib area is to use the Dr Kez ChiroLab Premium Vacuum Cupping set. Using the vacuum cupping set not only increases the circulation and helps to reduce inflammation, but it also breaks down the adhesions between the muscle layers extremely effectively.
- When you first put the vacuum cups on, they can feel extremely tight. Give it a minute or two and the pressure feels like it releases slightly. The pressure inside the cup doesn't change at all, except that the adhesions between the muscles begin to break away, releasing the feeling of pressure.
In the video
3:02 - Back Ribs Correction
3:49 - The next step for Ribs Correction
05:25 - Use of Vacuum Cups
07: 30 - The exercise recommended
08:55 - Live Chat with Audience
13:40 - Advantage and instruction of product
19:46 - Products shipping details

3:02 - Back Ribs Correction
Firstly the ribs must be corrected, and in this case an activator will not be enough to solve this problem, we need to call in the heavy duty drop-piece table. We set the table to perfect amount of tension to allow for a faster, more comfortable adjustment. Especially valuable when the area is inflamed and sore like this.
In this case, the strength of Em's chest muscles, compared to her back muscles is causing an imbalance in her scapulae (shoulder blades), resulting in them being pulled around the ribs and forward, leaving the ribs vulnerable to going out. Em needs to address this with some stretching and strengthening exercises to help this adjustment to hold and to prevent reoccurrence in the future.
3:49 -The next step for Ribs Correction
We're going to put a bit of oil on, so that we can use the vacuum cupping set. When treating an area like this, I like to use the vacuum cupping set as it allows us to accurately control the amount of pressure exerted by the cups, rather than using traditional fire cupping, which is much harder to control the amount of pressure exerted by the glass cup.
Using the vacuum pump, it brings up the skin and superficial muscles where the problem is to break up those adhesions between the two layers of muscles. There are multiple muscle layers in the back and whole body really, and over time they occasionally start to attach to one other. So when we try to move this area of our torso, the muscles are stuck to one another, whereas normally they glide nicely over one another. If you have this problem, you can feel stiffness in between your shoulder blades, when you go to move and reach for anything.
For most of us, we rarely do anything much with our back muscles to be able to strengthen them and keep them balanced. So what's going on with Em is that her chest is really strong in comparison to her back, resulting in the shoulder blades being pulled around the rib cage towards the front, leaving the ribs exposed and much more likely to subluxate, like has happened here.
05:25 - Use of Vacuum Cups
Use vacuum cups because it is easier to monitor the amount of pressure we apply. The usage of a small pistol causes the extraction of air beneath the cup, which then drags the skin and the superficial layer of muscle into the cup. The superficial layer refers to the muscle that is nearest to the surface when one muscle is layered on top of another. So, if one muscle is on the ribcage and the next muscle is on top of that, as is the case with the rhomboid major and minor, the muscle on top is referred to as the superficial muscle. It will be dragged up and into the cup in order to separate it from the muscle beneath. When you first put the cups on, they feel extremely tight. As the treatment continues, the pressure feels like it is decreasing, but in fact this is just the muscle adhesions breaking down. At this point it seems like the strain is starting to relieve and relax a little bit because your muscles, instead of simply pulling on the muscle below, begin to break away from that muscle. As a result, there seems to be less pressure in the cups.
07:30 - The exercise recommended
- Stretching in the doorway, where you have both of your arm up, get your forearm onto the door, up nice and high, also straight across in the crucifix position, then drop your arms down and then lean in to get all of the different orientations of the fibres.
- After you've completed that stretch, we recommend that you begin strengthening the back muscles. Whether you have a weight that you bend down and bring up like this, or resistance bands that you sit down on the floor with around your feet, draw your shoulder blades together and down, hold for 10 seconds, release and relax, and repeat 10 times. So you're teaching your body to put those shoulder blades back over the top of your ribs, preventing the ribs from popping out. So it is the key to preventing this problem.
08:55 - Live Chat with Audience
Live chat with Audience, taking their questions and providing them with answers
13:40 - Advantage and instruction of product
- The advantage of being able to use your ultrasound is that it can be used at home as soon as you feel pain. It is simple to use, just a couple of important things to remember:
- Make sure to use the gel every time you use the ultrasound to ensure the sound waves will penetrate through the skin to reach the inflamed tissue.
- You don't want to leave the ultrasound in one location, keep it moving about. This ensures that the sound waves get to where they need to.
- For all injuries and ailments use the ultrasound on the pulsed setting. This is the most effective setting for reducing pain and inflammation. The pulsed setting simply means that the sound waves turn on and off during treatment to give the body a chance to respond to the energy of the sound waves, giving the best results by far - you WILL NOT feel any physical pulsations.
- The ultrasound is a powerful 1Hz device, so please don't leave it plugged in at the wall when not in use, as the device handle will get unnecessarily hot.
- You will not feel or hear anything from the device, the sound waves are outside of the range of human hearing.
- If you want to get the absolute most out of your pain and inflammation reducing treatment with the ultrasound, consider using the Kirofix or Trauma Relief Cream on the skin before applying the gel. The ultrasound will then drive the natural active ingredients of these products deep into the body where they are needed most for healing.
- In this case, using the ultrasound is a must in order to minimise inflammation. Otherwise, the swelling will try to force the joint back out.
- The ultrasound is excellent for plantar fasciitis and heel spurs too. In this case, use the quad pack that has both the trauma relief cream and the bone aid relief cream, as this ensures both the damage to the bone and soft tissue is being addressed. Other conditions include; sprained ankles, tennis or golfer's elbow, trochanteric bursitis, frozen shoulder, knee pain etc. And even ordinary neck ache, middle back pain, and lower back pain. Obviously, you need to find someone to assist you with your back discomfort, because it can be a bit difficult to perform it on yourself.
19:46 - Products shipping details
This product is shipped without shipping costs to you.


